 8 Elixir
Overview
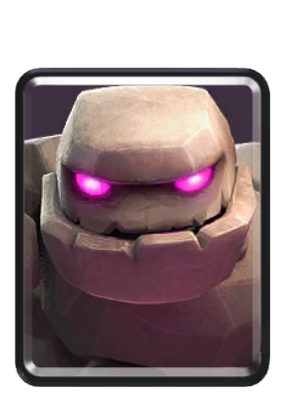
Golem is the heaviest tank in Clash Royale and the cornerstone of every beatdown archetype. At 8 elixir, this Epic building-targeting tank brings a staggering 5,984 HP to the arena, and when destroyed splits into two Golemites with 864 HP each that deal 114 death damage in a 1.5 tile radius. Combined, the Golem package delivers 7,712 total HP worth of value that must be chewed through twice. In the March 2026 meta, Golem maintains a 5-7% usage rate with a 50-53% win rate - a lower usage rate than many cards but a dedicated player base that consistently climbs with proper beatdown fundamentals. Golem punishes opponents who cannot manage elixir or who overcommit to offense.
Strategy
When to Play
Golem should almost always be played in the back corner behind your King Tower. This gives you time to regenerate the 8 elixir spent and build a massive push as Golem slowly walks toward the bridge. The ideal time to play Golem is: (1) when you have elixir advantage from a successful defense, (2) at the start of double elixir to establish tempo, or (3) when the opponent just committed 5+ elixir to one lane and cannot punish your Golem investment.
Never play Golem at the bridge in single elixir - you will have zero elixir for defense and lose a tower to any opposite-lane rush. The exception is triple elixir overtime: Golem at the bridge with Night Witch and Lightning ready can end games immediately. In single elixir, play patiently, defend efficiently, and wait for double elixir to unleash your beatdown.
Placement Fundamentals
Always place Golem in the back corner (the tile directly behind your King Tower on either side). This maximizes travel time, giving you approximately 15 seconds to accumulate elixir and place support troops. As Golem approaches the bridge, stack your support troops behind him in order: splash damage first (Baby Dragon, Night Witch) then ranged DPS (Mega Minion, Electro Dragon).
If you need to play Golem at the bridge in double/triple elixir, place him one tile from the river to engage the tower as quickly as possible. Against buildings (Inferno Tower, Tesla), place Golem in the center to potentially pull the building so both towers are not firing simultaneously. When opponent plays Tornado, place Golem slightly to the side so a King Tower activation pull does not drag your entire push.
Synergies
Golem + Night Witch is the classic beatdown combo. Night Witch spawns Bats continuously while walking behind Golem, and opponents must decide between addressing the 5,984 HP tank or the growing swarm of Bats. Baby Dragon provides air splash behind Golem, killing Minions and Bats that opponents throw to distract. Lightning is Golem's best spell: it destroys Inferno Tower, Musketeer, or Electro Wizard behind the tower for 6 elixir while dealing 877 damage to three targets. Tornado pulls defensive troops into Golem's death damage radius and groups everything for Baby Dragon splash. Lumberjack in front of Golem drops a Rage spell on death, turning the remaining Golem and support into a hypercharged push.
Matchups
Strong Against
- Cycle decks (Hog 2.6, Miner Cycle): These decks lack the sustained DPS to chew through 7,712 total HP. By double elixir, Golem pushes overwhelm their light defenses
- Spell bait: Swarm-based defenses get crushed by Golem's support troops (Baby Dragon splash, Night Witch Bats). They cannot stop the push once it builds
- Graveyard: Golem beatdown's aggressive tempo prevents Graveyard decks from establishing their slow, defensive rhythm
- X-Bow/Mortar: In double elixir, Golem in the X-Bow lane tanks the siege weapon while your support troops destroy it. X-Bow cannot out-damage Golem's HP pool
Countered By
- Inferno Tower + swarms: Inferno Tower melts Golem in 6 seconds, and swarms (Skeleton Army, Minion Horde) distract support troops. Must Lightning the Inferno
- P.E.K.K.A bridge spam: P.E.K.K.A kills Golem efficiently while Bandit and Battle Ram rush the opposite lane, taking a tower before your push connects
- Opposite-lane rush: Any 8+ elixir commitment opposite lane after Golem placement forces a lost tower. Lava Hound players and bridge spam exploit this constantly
- Tornado + splash: Tornado pulls the entire push into King Tower activation range while Executioner or Baby Dragon splashes everything. Devastating counter
- Electro Wizard + Inferno Dragon: Dual reset and ramp damage combination is extremely difficult for Golem to push through without Lightning
Tips
Pump if they let you: If you run Elixir Collector and opponent has no Fireball in rotation, pump up first. The extra elixir generation makes your Golem push arrive with more support troops.
Sacrifice a tower strategically: If opponent rushes opposite lane after your Golem, sometimes it is correct to let the tower fall and commit fully to your Golem push. Trading towers while taking theirs with a massive push is a winning Golem strategy.
Lightning the Inferno: Always save Lightning for Inferno Tower. If you Lightning reactively the moment Inferno plants, your Golem walks through with 3,000+ HP and overwhelms remaining defense.
Golemite death damage value: When Golem dies, position your troops so Golemite death damage (114 each, 228 total) hits defensive troops. This extra chip often kills weakened Musketeers or Electro Wizards.
Double elixir Golem timing: Play Golem the instant double elixir starts (1:00 remaining). This catches opponents off-guard and establishes tempo before they can adjust their defensive approach.
Stack behind Golem gradually: Do not dump all support at once. Place Baby Dragon first for splash, then Night Witch 3 seconds later, then Mega Minion. This staggers your investment and prevents Rocket or Lightning from hitting everything.
Opposite lane Golem punish: If opponent plays Golem or Lava Hound same lane, drop your Golem opposite. Your Golem push will be faster because you are closer to their tower with less distance to travel.
Common Mistakes
Playing Golem in single elixir without advantage: Dropping 8 elixir leaves you completely defenseless. Opponents rush the other lane with Hog, Balloon, or Ram Rider and take a tower for free.
Golem at the bridge in single elixir: Without time to build a push behind him, Golem at the bridge is just 8 elixir for 400 tower damage. The opponent defends cheaply and counterpushes devastatingly.
Not saving Lightning for Inferno: Using Lightning on offense to chip tower when opponent has Inferno Tower in rotation means your next Golem push gets melted. Always hold Lightning as Inferno insurance.
Overdefending in single elixir: Spending 12 elixir defending a 6-elixir push means you cannot afford Golem in double elixir. Accept some chip damage and save elixir for your beatdown timing.
Ignoring Golemite death damage: Letting Golemites die in empty space wastes 228 potential damage. Tornado or push troops near dying Golemites to maximize every point of damage from your 8-elixir investment.